This is my favourite go-to method of finishing a knit neckband. You can use it as a speedier alternative to binding. And it can even be added to a woven body.
Firstly, what kind of knits?
Fibre content:
I alway prefer to use "natural" fibres, wool, cotton and silk. Or halfway fibres like viscose, modal, cupro and rayon (these fabrics are vegetable-based but very processed.) Petroleum-based fabrics like nylon and polyester do not always like to play by the rules - they generally want to return to their original shape and can be difficult to work with.
Lycra blends are do-able but with high levels of lycra (more than 5%) the fabric will want to retract which will work against what you are trying to achieve. Smaller amounts of lycra (especially in very light fibres with little natural memory) will balance out the texture and give support to your neck band.
Fabric knit structure:
- Plain knit jersey is great if you are making a tee in the same fabric.
- Rib knit is the premium for this method but is generally hard to come by in a matching colour and weight. Rib can come as a fabric on a roll or a trim with a finished edge. The benefit of ribbing is that the structure is essentially a concertina so, like a fan, it is easy to shape into a curve.
- Super thick fleece will require some patience and give you some chunky seams to sew through so this might be a weight to work up to. Alternatively find a contrast rib to work with.
Secondly, what's the method?
The goal with a neckband is to turn a straight piece of knitted fabric and shape it into a curved piece without gathering the body or having a saggy neckline.
The width of your finished neckband will be limited by what type of knit you are using. As a general rule, a finished width of 1.25 -1.5 cm for flat knits and up to 5 cm for ribbing. You can experiment with a cut and folded neckband to see how curved you can press it.
How long should you cut your neckband?
I would love to tell you to just cut it the same as your neckline seam, minus 15-25%. But in my experience that's a sure-fire way to get manufacturers to yell obscenities at me. There are way too many variables affecting how stretchy a neckband will be to have a basic rule for all fabrics.
So, here is the slightly more complex (but way more reliable) way of getting a tidy neckband measurement.
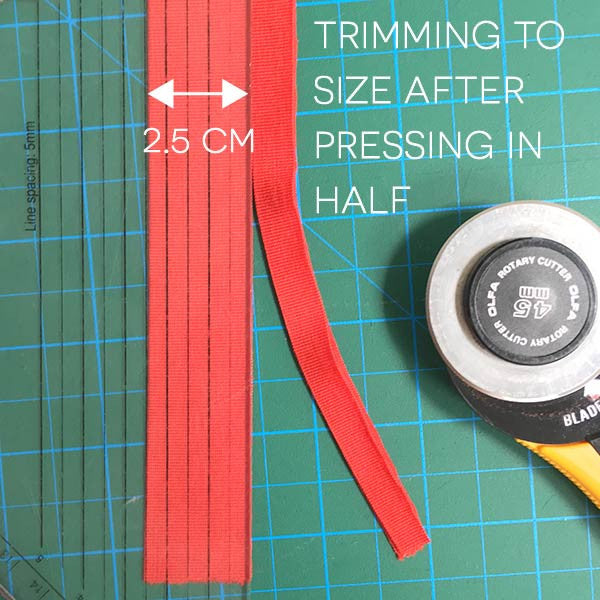
1. Cut your neckband, with the greater stretch going along the length of the fabric. Cut it to = length of your neck seam line x double your finished width + seam allowances. *If your fabric is very curly at the edges, cut it wider than needed.


3. Measuring from folded edge the correct width and trim to make a clean edge. Using scissors is fine.
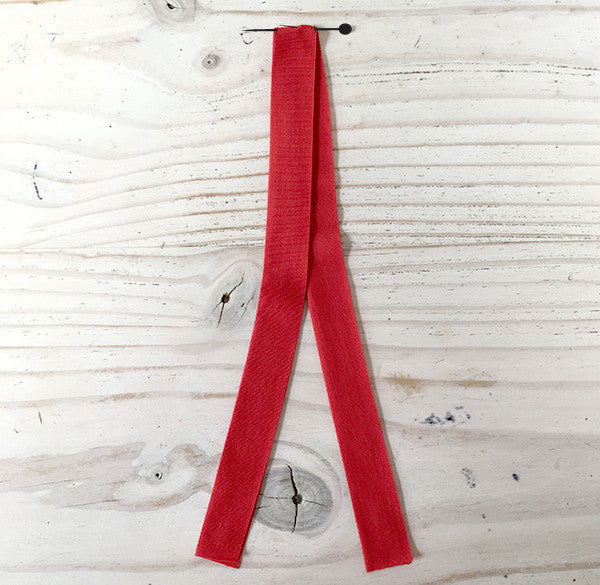
4. Fold in half to find the Centre Front Neck and pin.
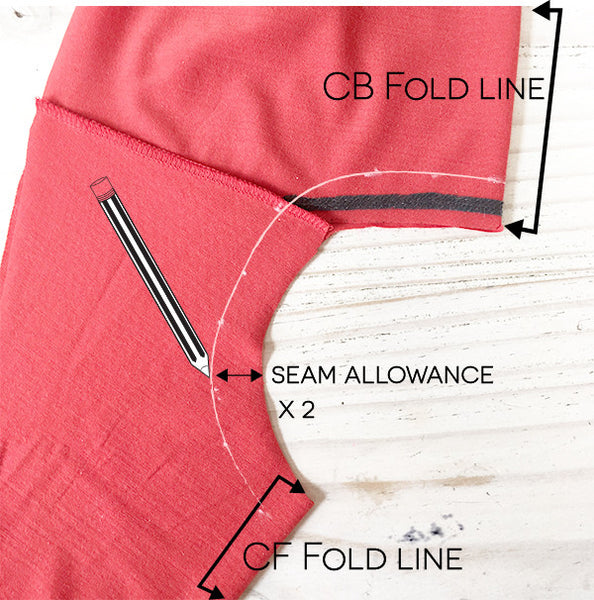
5. With the shoulder seams pre-sewn (but side-seam left open). Fold garment in half along Centre Front and Centre Back.
6. You can chalk or do this step by eye. Mark line around neck line = 2 x seam allowances, in from raw edge.
e.g. 2 cm for a 1 cm seam allowance.
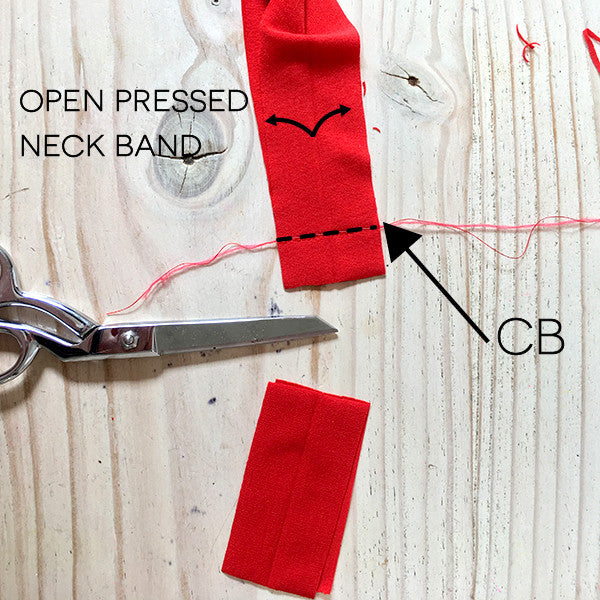
7. Open Centre Front Fold of neckband.
8. Place pinned Centre Front, neckband to CF of neckline. With the raw edge of neckband lining up to previously marked line. e.g. overlapping seam allowances.
9. Stretch the neckband raw edge, following neck line and curving neckband.
10. Mark any key points on neckband, shoulder seam and centre back neck. If the neck line is large add extra notches to neck line and neckband. Keep a check on the distribution of stretch.
*How much to stretch depends on each fabric used. As a guide I try to keep the inner, folded, edge of the neckband sitting smoothly whilst trying to make a circular shape. Your neckband's raw edges might roll back and warp but as long as the folded edge remains unstressed.
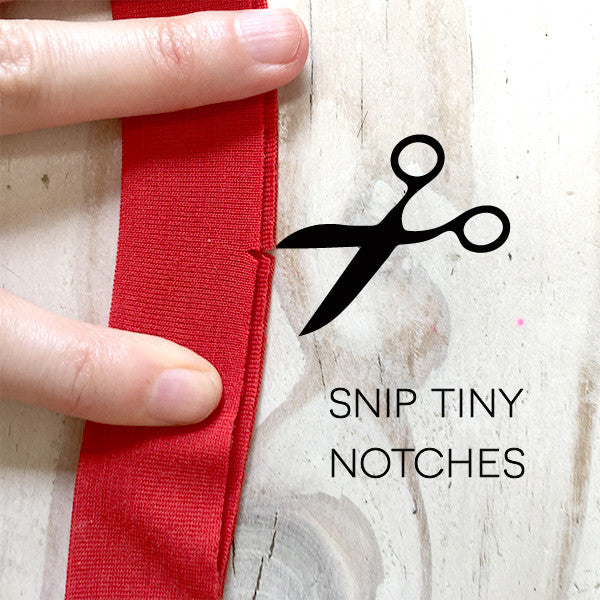
11. Translate marking into little notches on both side of neckband.
12. Unfold neckband, sew in CB seam with a longer stitch not quite a baste and no back stitching in case you need to remove and try again.
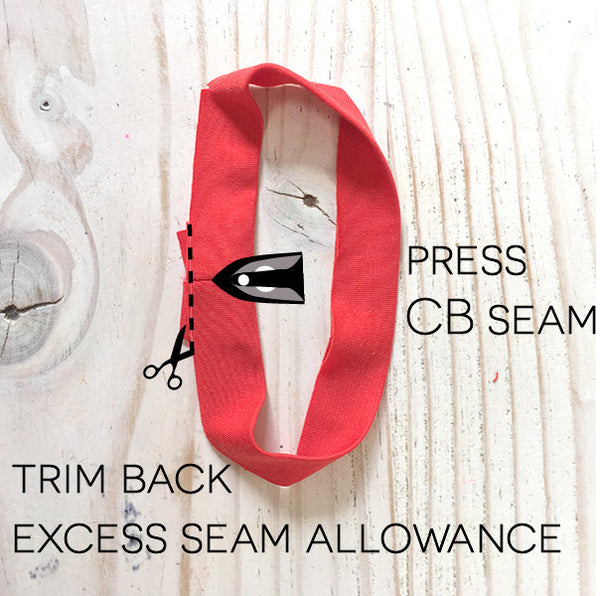
13. Trim off excess leaving approx 2 cm seam allowance.
* Keep what you have trimmed off and pin to your pattern piece. You can use this as a reference if you make the neckband again in a similar fabric.
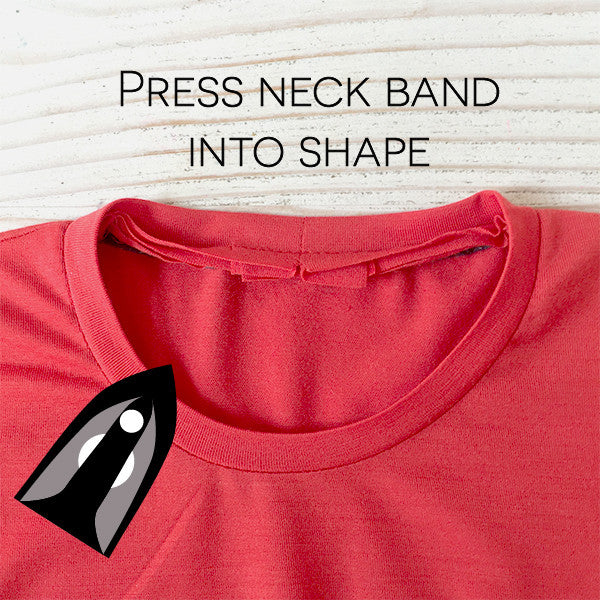
14. Press Centre Back Seam.
* For thicker fabrics you can trim triangles out of seam allowances to reduce bulk. This does mean you have to re-cut the neckband if you have made it too small.

15. Re-fold neckband and press again.
* For very small necklines and skivvies this is a great chance to check that the neckband fits over your head.
16. If you have a bit of seam poking out, trim back for a clean edge.
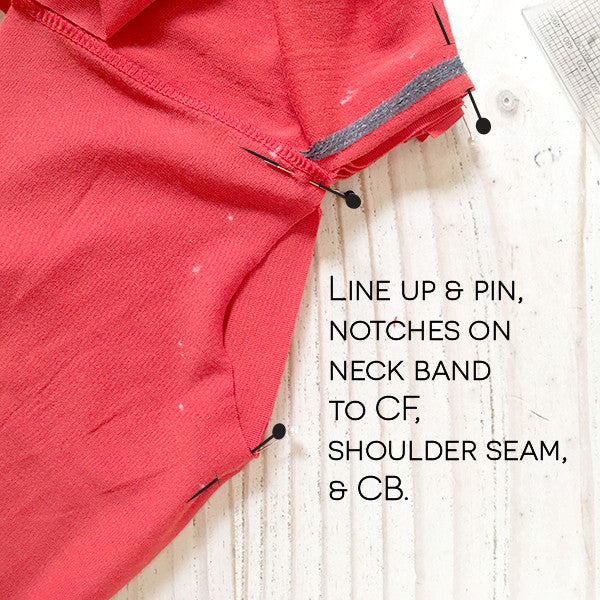
17. Pin neckband matching notches to Neck Line.
18. Pin in between notches, stretching neckband to distribute evenly. Lots of pins really helps here.

19. Machine baste with a straight stitch.

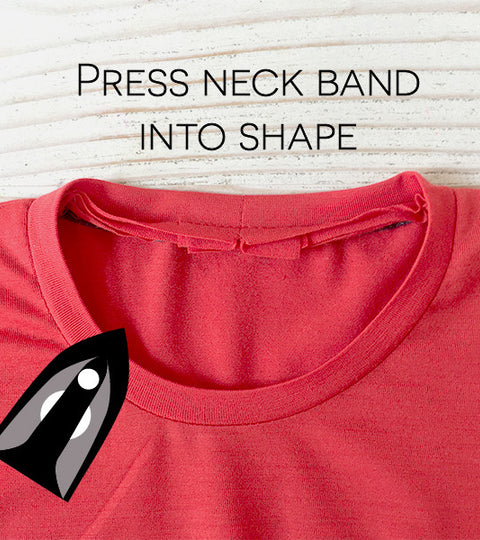
20. Press with lots of steam. Help set the neck by holding the fabric in place whilst it cools. The cooling sets the fibres, not the steam.
21. Check to see if it is sitting nicely without gathers or poking up.
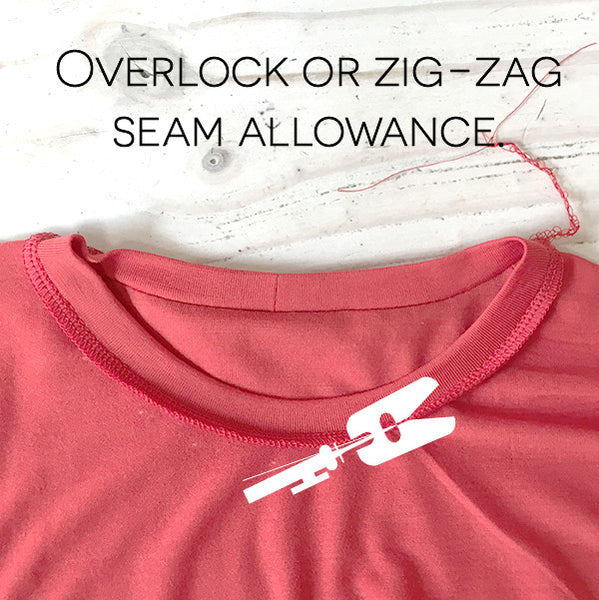
22. Once it looks right overlock the pre-basted neck seam. Trimming the seam allowances back to 6 mm.
*If you don't have a 4 thread overlocker.
You can sew the seam with either a stretch stitch on a domestic machine or a straight stitch and using wooly nylon in the bobbin.
Finish the seam allowances with a 3 thread overlocker, trimming the seam allowances back to 6 mm.
or
Zig-zag or three step zig-zag finish seam allowance and manually trim allowances back to 6 mm.
23. Press seam allowances.
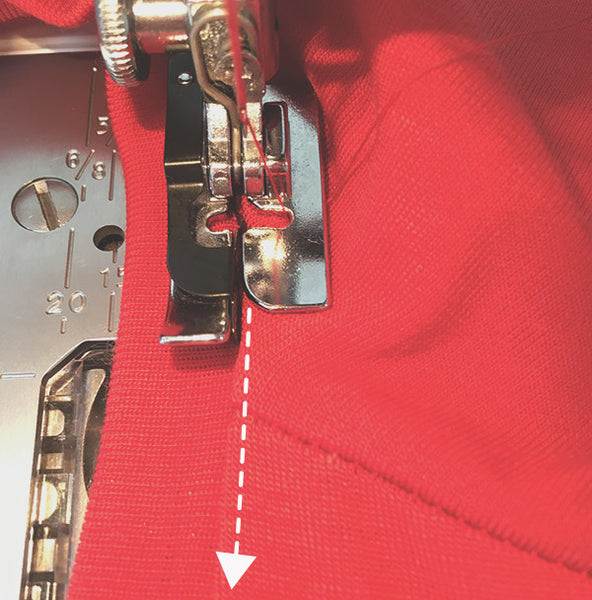
24. Edge stitch your seam allowances to the body of your garment.
a. Flip your garment right side up.
b. Put on an edging presser foot to your sewing machine.
c. With either a straight stitch with wooly nylon in the bobbin (highly recommended) or using a twin needle with normal thread, sew around the circumference of the neck sewing the seam allowance to the body of the tee.
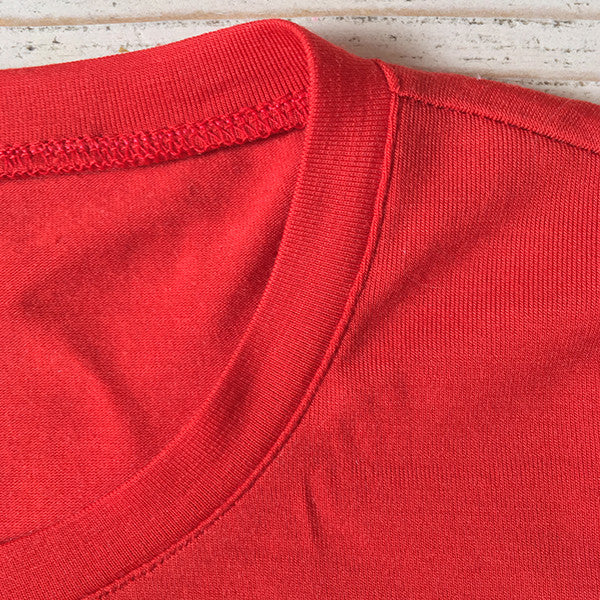
25. Press and admire.
6 Comments
I used this today and my neck band turned out worlds better than the last one. Thank you!
This was great! I tried today and it’s the best knit neckline I’ve done.
Thank you so much for the tutorial….at last a satisfactory band neckband.
Great tutorial. I have had the wavy neckband problem and now I know how to solve it!
Excellent tutorial! I would love to see a video of this?
This is an awesome tutorial. Thanks!!