This tee-shirt tutorial is the basis for a series of tee-shirt patterns that Pattern Fantastique will continue to release.
The latest Glacial Tee comes with a multi-sized pattern & cutting sheet.
The sewing instructions comprise of this screen-based tutorial, with various links to some of our other knit sewing instructions so you can smash out all your tee-shirt needs.
Fabric preparation
Knits are the one fabric type I don't pre-wash. This is to avoid warping which can make cutting a pesky task. I do expect shrinkage to happen after washing a finished garment and this mostly effects the length. The stretch should maintain fit across the body. If you are concerned about lengths and shrinkage I suggest lengthening garments by 2.5 cm or 3-5% of what you would like your finished length to be.
If you have the space lay your fabric flat when cutting knits as opposed to folded. This will give you better scope to find the Grainline (knits are usually sticky and hard to make sit flat) and on Grain when folded.
In clothing manufacturing, once the layers of knits are laid they the fabric should sit for 24 hrs so any stretch can retract after being unrolled. This process happens less and less these days as it slows down manufacturing time. But it is worth while doing this at home even if it is just for an hour. Keep the fabric on a smooth surface so it can slip back to shape.
Stabilising
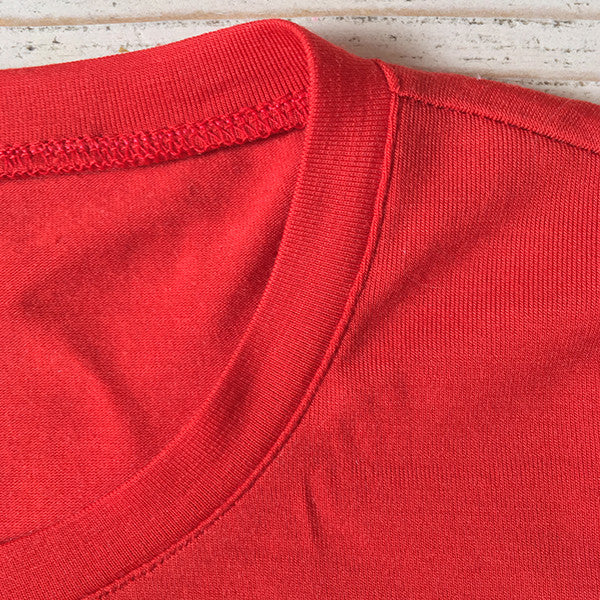
The back neck and shoulder line of most tees are key to holding the shape in a garment so for knits this needs to be stabilised. You don't want the neck and/or shoulder line to stretch on your tee - it will look sloppy and possibly fall off the shoulder or have a drop shoulder where it isn't intended. We don't stabilise the front neck as it's not usually necessary but you might need some stretch in the neck hole to get it over your head.
* All Pattern Fantastique patterns will specify where they need stabilising.
I recommend using a stitched stay tape which you can either buy or DIY.
1. Measure off how much you will need by running the tape along the seam line on the pattern. Go from edge to edge so the ends will get included in a seamline.
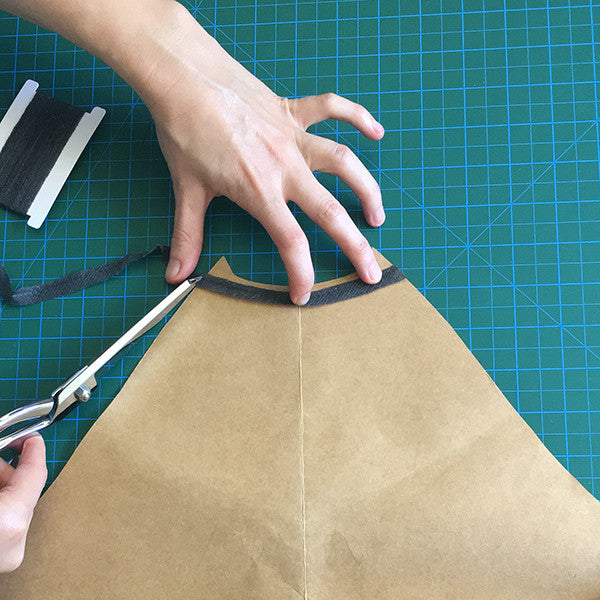
2. Place the stitch line of the stay tape just to the inside of your seam line. So for a 1 cm seam allowance place the stitch line 8 mm from raw edge. Do this approximately, no need to get too precise.
3. Iron (with no steam) on a mid to low heat (enough to melt the glue BUT not so much you melt the stay tape).
* If you are doing a back neck and shoulder line I like to tape it all in one and bypass the seam allowance junction of the neck line and shoulder seam. This is to reduce bulk when finishing neck line.
* For raglan styles you can just do the back neck seam line.

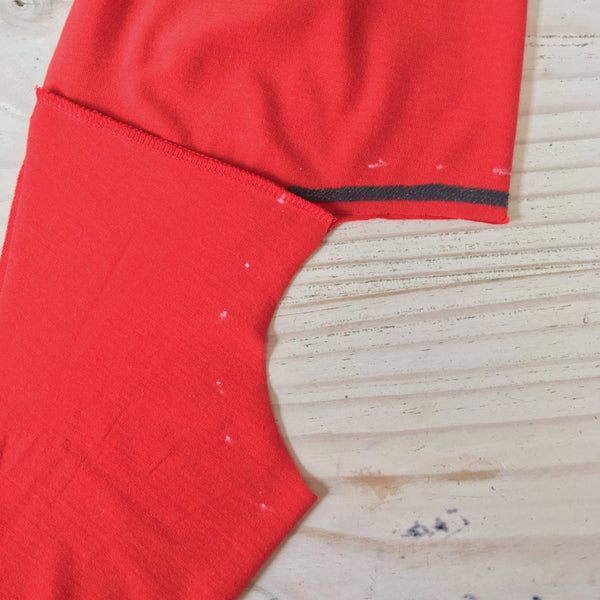
* Those extra points of fabric hanging off the back neck, shoulder and under the armpit line are there to assist with handling fabric that rolls up after being cut. It makes it much easier to feed into machines having that little extra tab to hang onto. Trim them once you have finished sewing the corresponding seam (overlockers will do that automatically.)
Sewing
To prepare for sewing your garment you will need
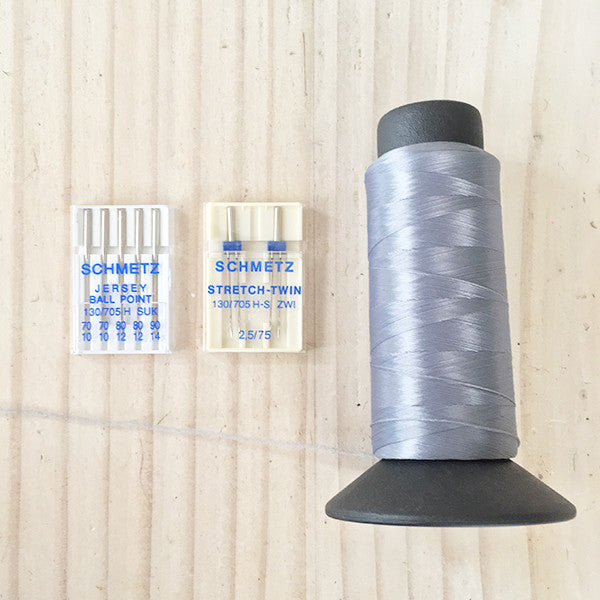
- Stretch sewing needles (aka ball point needles. )
- Wooly/fluffy nylon thread and/or narrow twin needles.
You can purchase stretch sewing kits here.
There are a few choices to make around how you and your machine prefer to seam, topstitch and hem knit fabrics.
On a very plain tee I like a faux flatlock or a decorative stretch stitch to finish with. I will often hem my sleeves differently from my body hem depending on how streamline they look.
My machine will happily twin needle through two layers of a light fabric but needs three layers with the wooly/ fluffy nylon method without the tension going funny. I like wooly/fluffy nylon so I will do a double turn on hems to make that method work for me and my machine.
I suggest you test and decide how to hem and finish your neckline before you start. This will help with the hem preparation.


Prep Hems
1. Overlock raw edges and press your hems or just press for non-overlocking construction. I know this seems a bit early but whilst your bits are unattached and flat this is the best moment to set them up.
Here are some hemming options
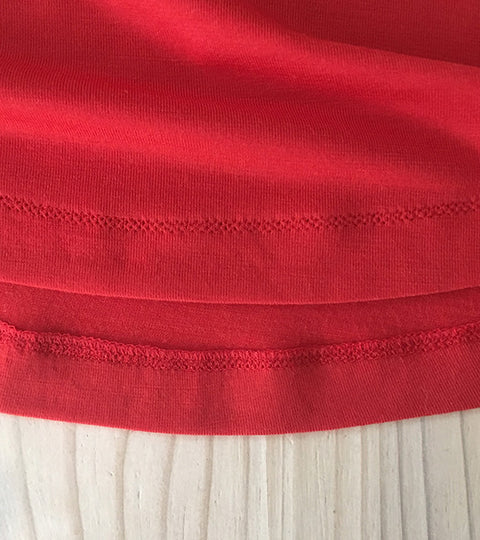
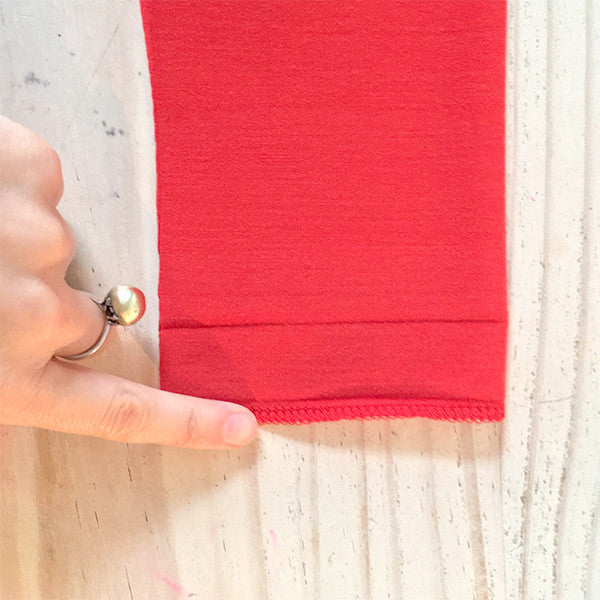
A. SINGLE TURNED HEMS
A single turn of 2.5 cm and a twin needled or faux flat lock stitch is usually the most straight forward. It suits most weights and slightly curved hems.
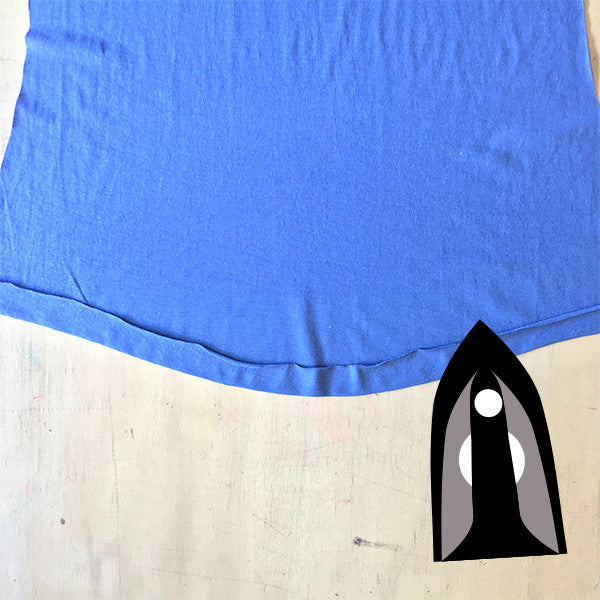
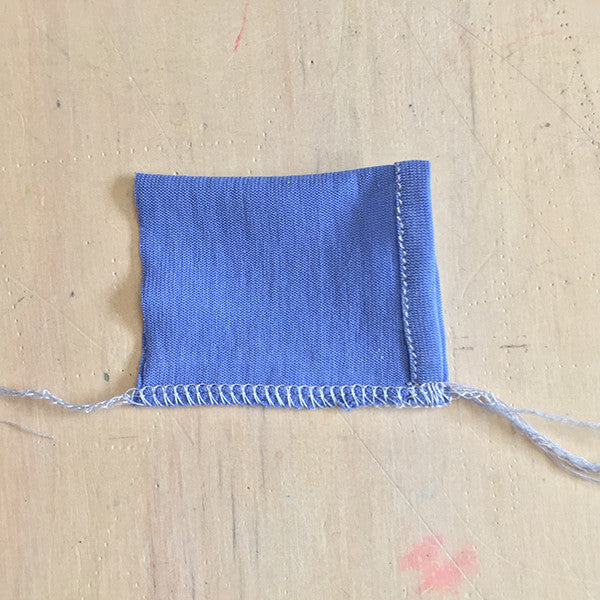
B. DOUBLE TURNED HEMS WITH STRAIGHT STITCH ( and wooly/ fluffy nylon in the bobbin)
Wider double turn; Turn back overlocking or 8 mm and then fold again at hem fold (marked on pattern).
This is best for sleeves or straight hems.
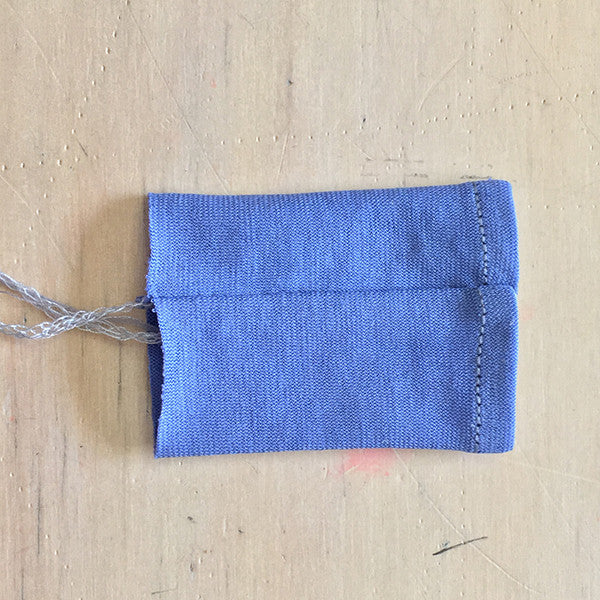
Very suited to super fine knits. It can be done on sleeves, body hems and around gentle curves.
Tricky bits on hem preparation
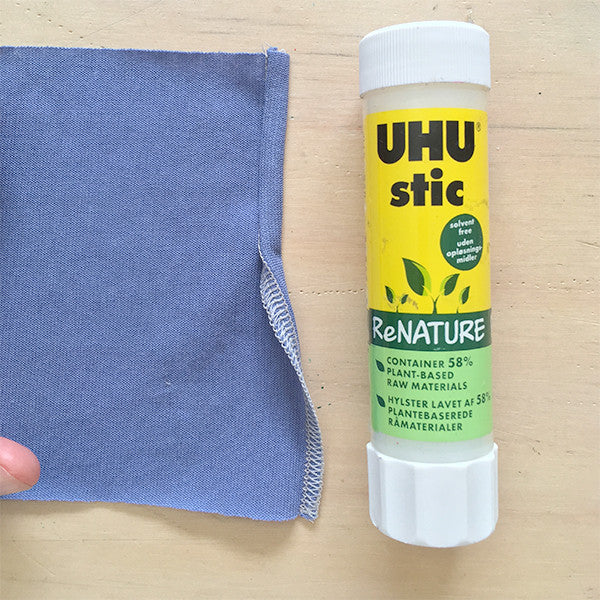
Do you have rolling edges and fabric that won't sit still? A glue stick will be your new best friend here. I haven't found any difference between the fabric variety v's a standard glue stick yet. Always test first.

Hemming narrow sleeves can be a stress, particularly with a light fabric if the sleeve has been seamed already. I find Merino knits are often happy to snap back into place but other very light fabrics are better off being hemmed prior to sewing the inner arm seam.
Back to construction
2 . Seam your shoulders or raglan sleeves together. Either with your 4 -thread overlocker or a stretch stitch on your sewing machine.
You don't need to finish knit fabric raw seams as they won't fray.
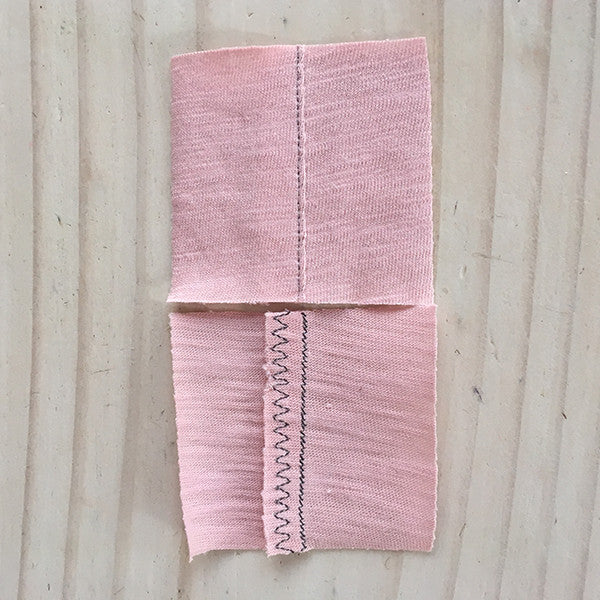
If you would like to control the rolling of the seam allowance:
- use a three step zig-zag on raw seams ( a standard zig-zag tends to raise a channel ) OR
- edge stitch the seams to one side using a wooly / fluffy nylon thread in the bobbin.
3. Press your seams.
4. Insert your knit neck band - full tutorial here.
5. Attach the sleeves unless you already have with a raglan.

6. Press the seam allowances flat (usually toward the sleeve.)
7. Sew the side seams and press seam allowances to the back body.
6. Finish hemming and give the garment an all-over press.
Rinse and repeat!!
1 Comment
I’ve sewn garments from t-shirts to tailoring for over 30 years and follow many sewing sites. This is one of the best written and most helpful tutorials I’ve read. Your designs are wonderful and I love the idea of eliminating written instructions. Great work!